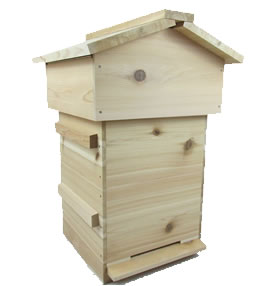
How to Build a Beehive Box: A Comprehensive Guide
Building a beehive box is an essential skill for beekeepers who want to customize their hives or replace old, worn-out equipment. A beehive box, also known as a hive body or super, provides living space for bees and serves as a foundation for honey production. Here's a step-by-step guide to building a basic Langstroth-style beehive box, one of the most common hive designs used in beekeeping.
Step 1: Gather Materials
Before you begin, gather the necessary materials:
- Wood (pine or cedar)
- Hive box plans or dimensions
- Saw (circular saw or table saw)
- Measuring tape
- Square
- Pencil
- Drill with screwdriver bit
- Screws or nails
- Sandpaper
- Protective gear (gloves, safety goggles)
Step 2: Cut Wood to Size
Using the hive box plans or dimensions as a guide, measure and mark the wood according to the desired size of the hive box. Use a saw to cut the wood into pieces for the sides, ends, and bottom of the box.
Step 3: Assemble the Box
Once the wood is cut to size, assemble the hive box by attaching the sides and ends together using screws or nails. Use a square to ensure the corners are square and the box is properly aligned. Pre-drill holes before inserting screws to prevent splitting the wood.
Step 4: Add Handles (Optional)
If desired, add handles to the sides of the hive box to make it easier to lift and move. Drill holes for the handles and attach them securely using screws or bolts.
Step 5: Install Frames and Foundation
Once the box is assembled, insert frames into the box and secure them in place. Install wax foundation or comb guides into the frames to provide a starting point for bees to build honeycomb.
Step 6: Sand and Finish
After assembly, sand any rough edges or surfaces to smooth them out. Apply a protective finish, such as paint or wood stain, to seal the wood and protect it from weathering and decay.
Step 7: Install the Box in the Hive
Once the box is complete, install it in the hive stack according to the hive configuration. Ensure the box is level and properly aligned with the rest of the hive components.
Conclusion
Building a beehive box is a satisfying and practical task that allows beekeepers to customize their hives and provide suitable living space for honeybee colonies. By following these steps and investing time and effort into craftsmanship, beekeepers can create durable, functional boxes that support healthy bee populations and facilitate honey production.
Remember to prioritize the health and well-being of the bees when building and maintaining hive equipment, ensuring they have adequate space, ventilation, and protection from environmental factors.